Image

This article will guide you through setting up a Droplet on Digital Ocean to host Wordpress website
To create a droplet on Digital Ocean, goto Digital Ocean → Droplets and click on the Create, from the dropdown select Droplets.
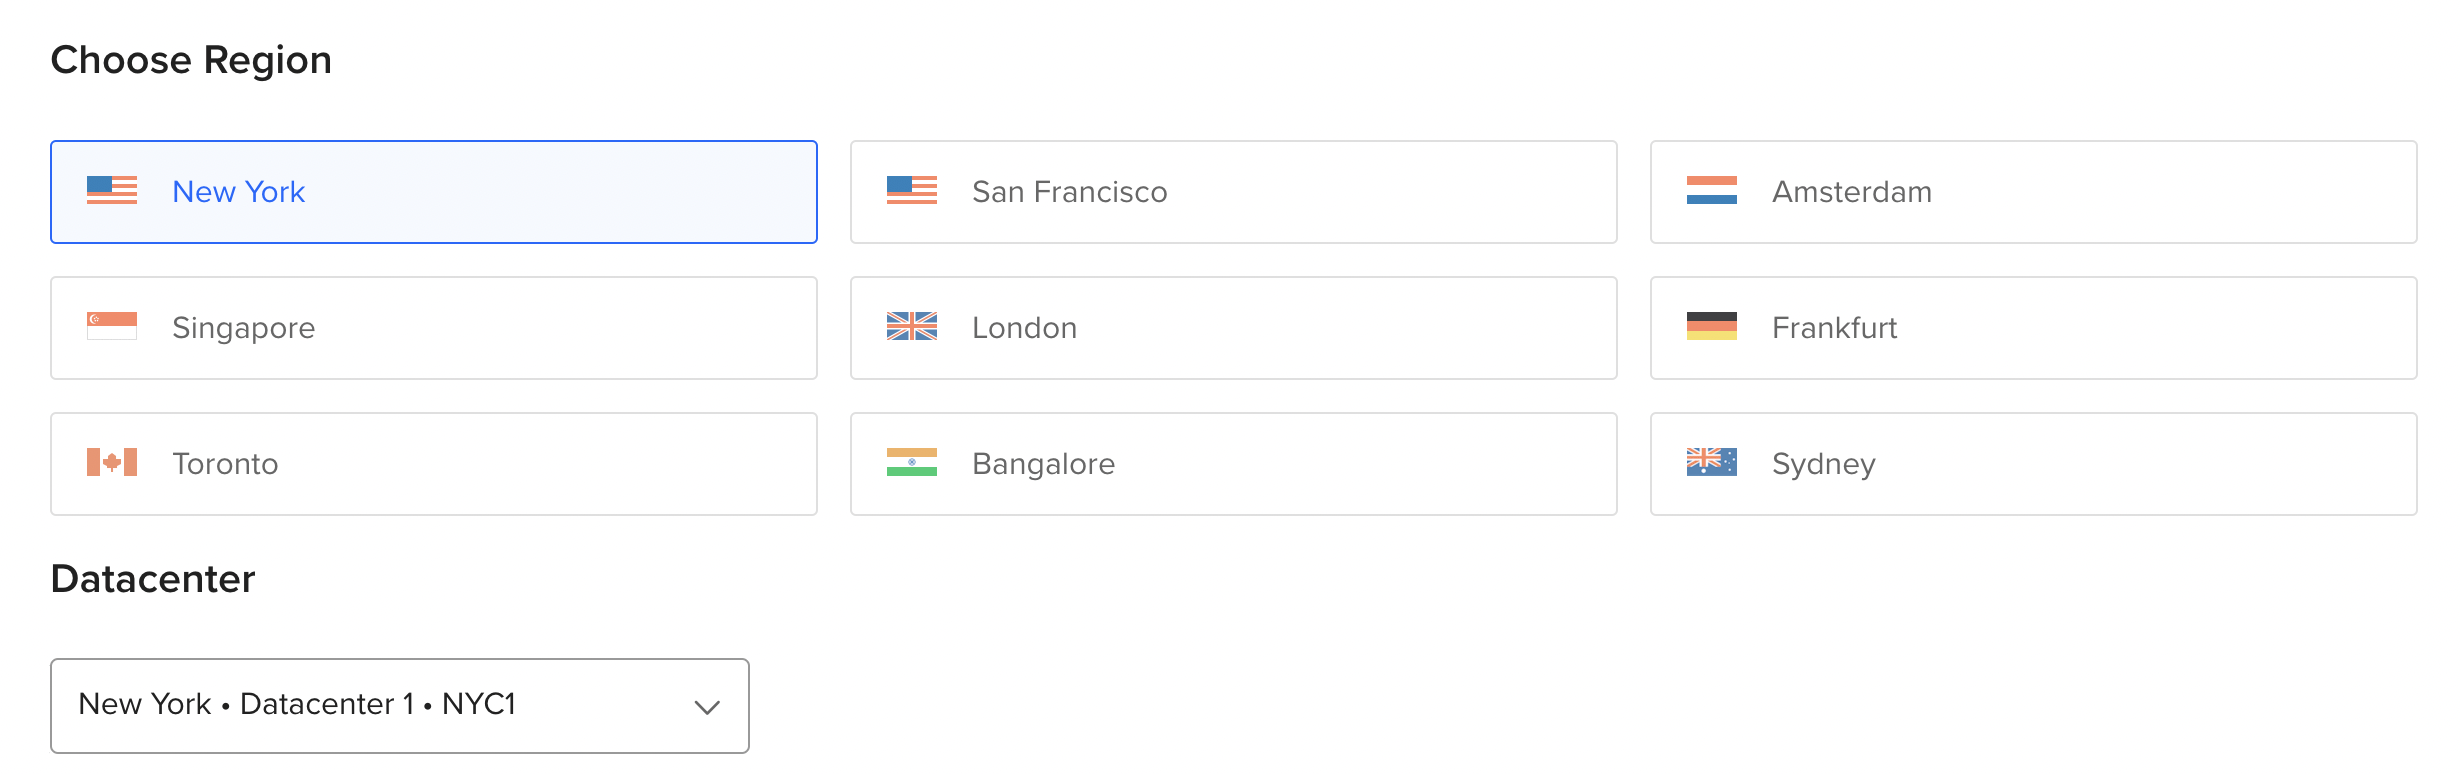
Choose a region which is closest to your end users, based on the region you choose you can pick your datacenter. By default Digital Ocean assign you a datacenter based on available slots in the datacenter
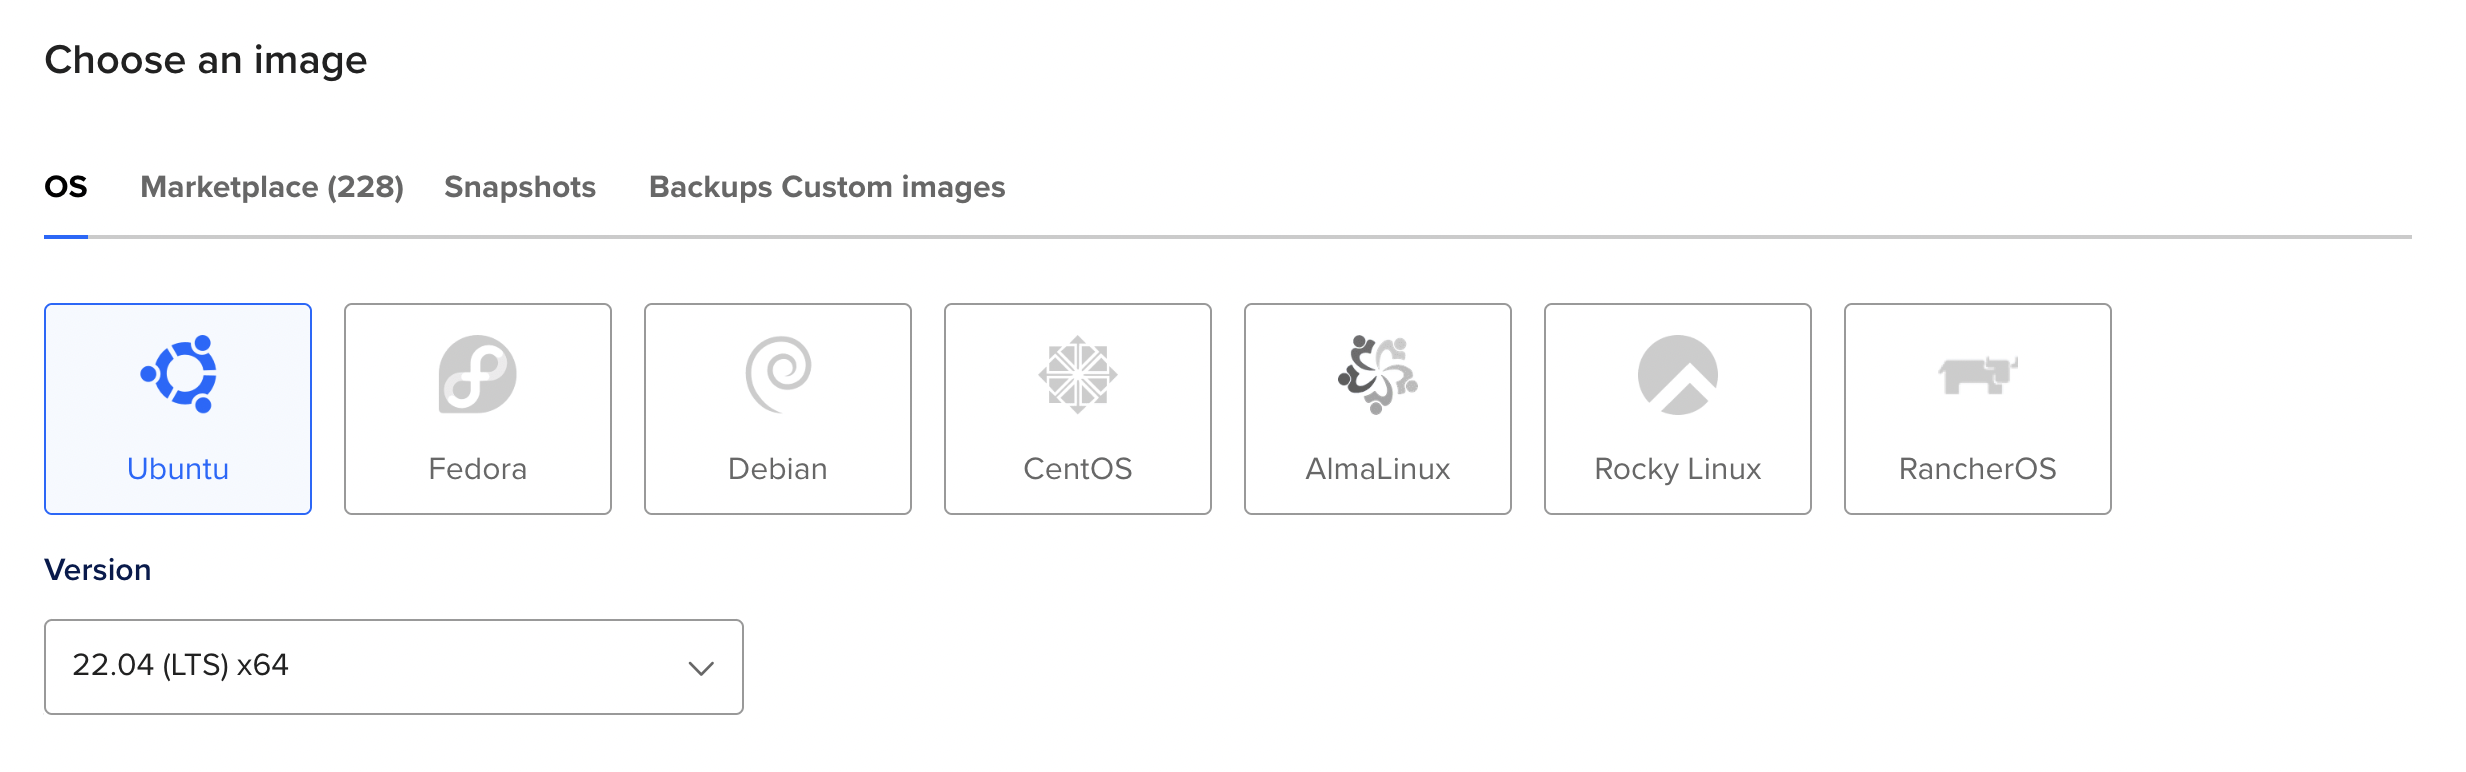
Choose an image from the list of available images. For the sake of this article we are going to choose 22.04 (LTS) x64. Optionally you can choose an image from the marketplace, snapshots of other droplets or from backup images on Digital Ocean.
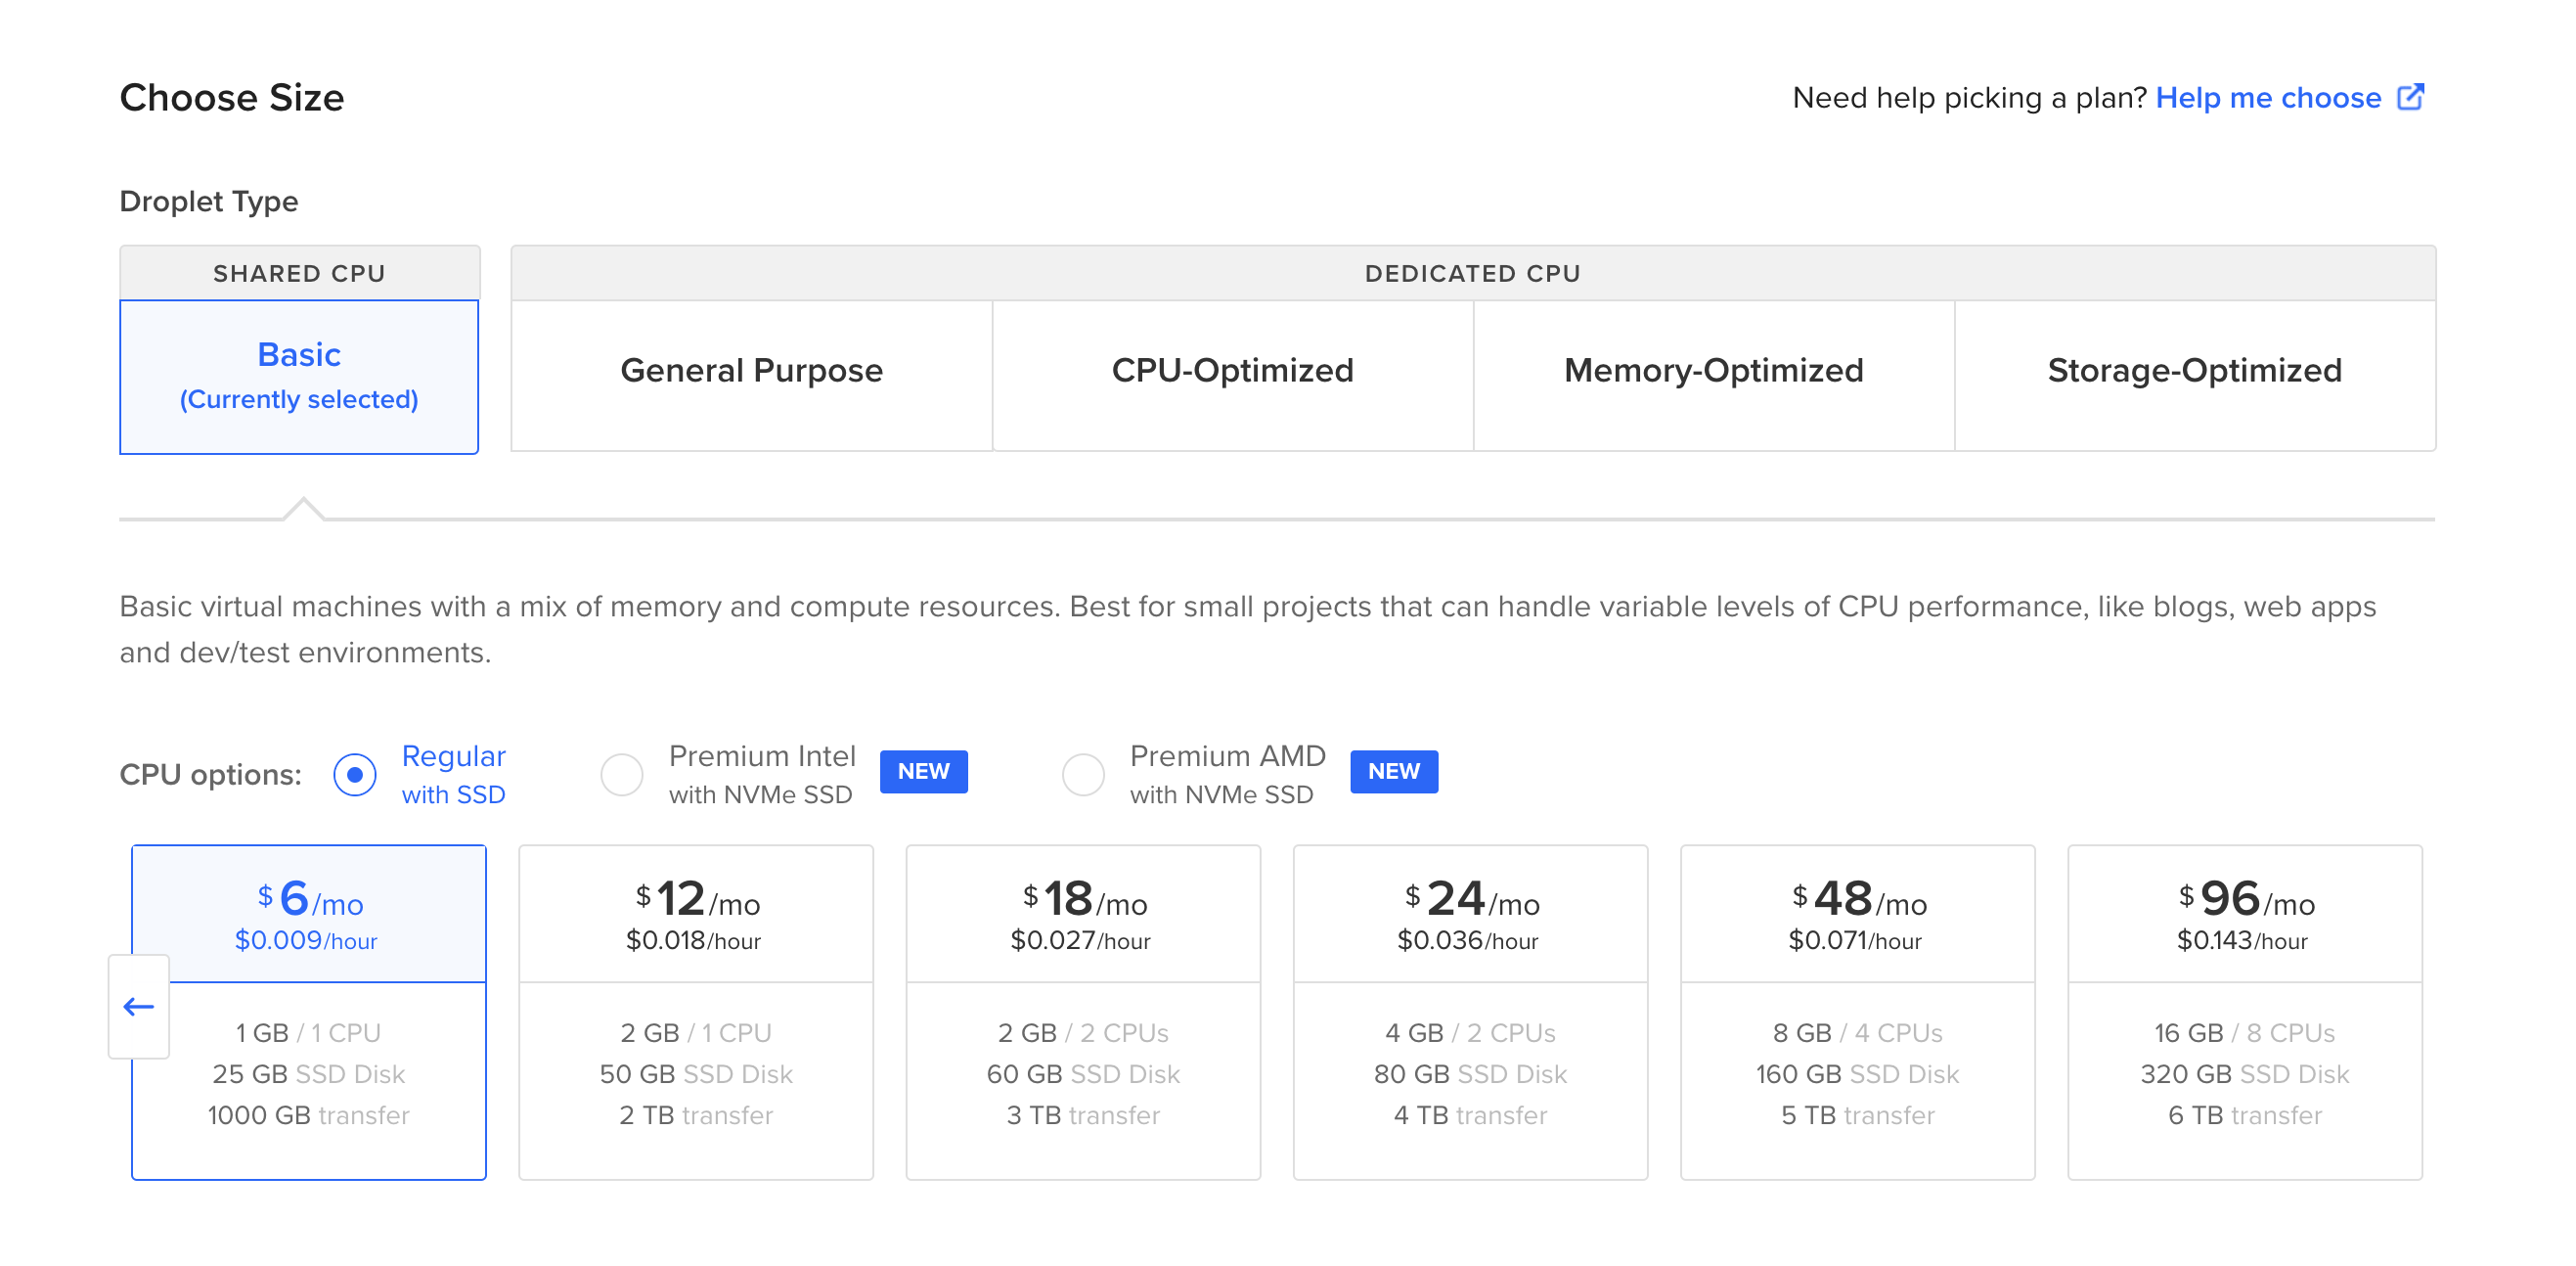
Choose the size of the Droplet, for our purpose, as we want to host our Wordpress website, we are going for everything basic. Depending on the datacenter selected you'll have different options available to pick from, we are going to opt for
Shared CPU → Regular with SSD
Processor → 1GB / 1 CPU
Storage → 25GB SSD Disk
Bandwidth → 1000 GB Transfer
Additionally you can also add a block storage volumes which can be seamlessly moved between to your Droplets
You can login to your Droplets either via password or via SSH key. For this article we will use the SSH Key, by clicking on the option under Choose Authentication Method → New SSH Key, creating a key and selecting it. However you can also choose the password option where you will be asked to set up a root password.
Additionally you can also choose other options like monitoring, auto backups.
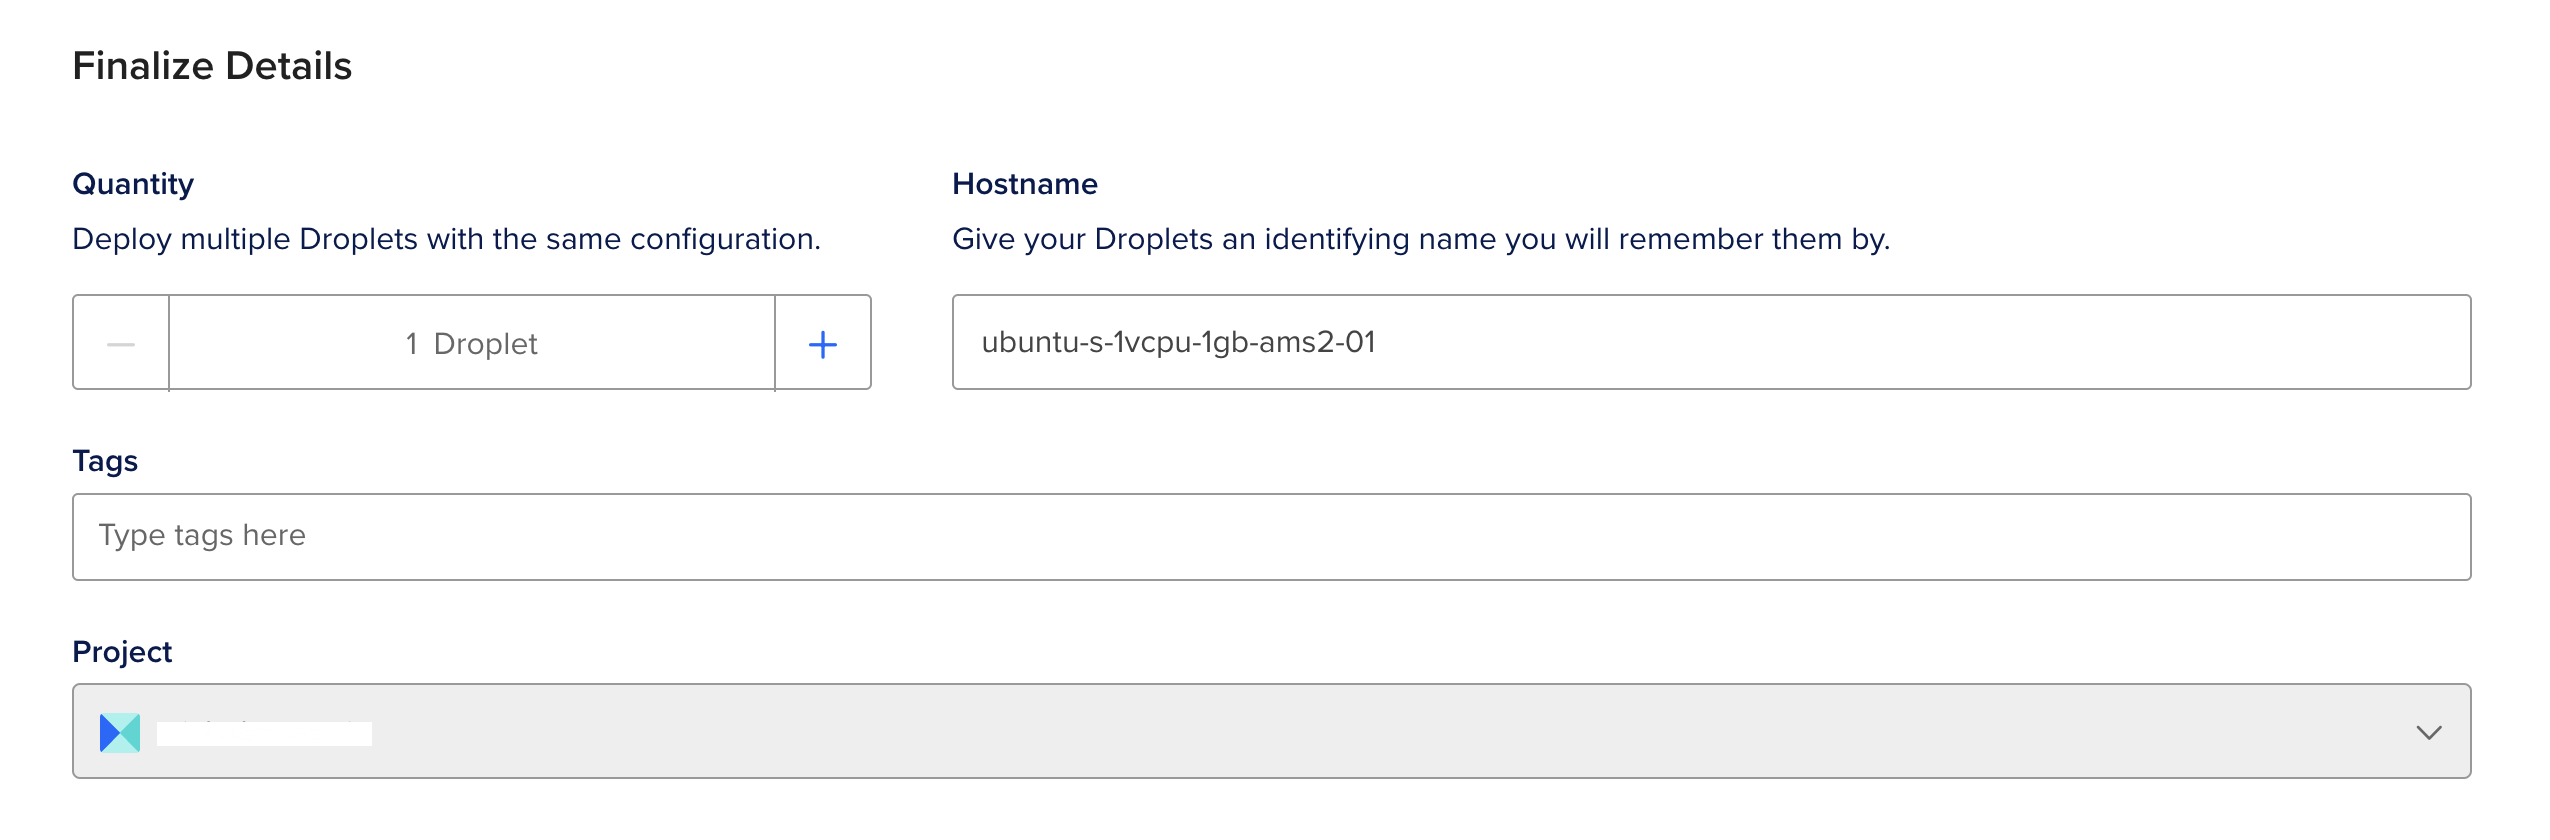
To finalise, you can choose the number of droplets you want to spin up, name/identifier of the droplet. Optionally you can tag your droplets and finally choose the project where you want to create the droplet.
Additionally you can create your droplets via command line as below
curl -X POST -H 'Content-Type: application/json' \

    -H 'Authorization: Bearer '$TOKEN'' \

    -d '{"name":"ubuntu-s-1vcpu-1gb-ams2-01",

        "size":"s-1vcpu-1gb",

        "region":"ams2",

        "image":"ubuntu-22-04-x64"}' \

    "https://api.digitalocean.com/v2/droplets"
You’ll need to either save your API access token to an environment variable or substitute it into the command. Additionally, you will need to provide a name for your droplet as well. You can create multiple Droplets, by adding multiple droplet names. Click here to learn more about API parameters and click here to generate your API access token.